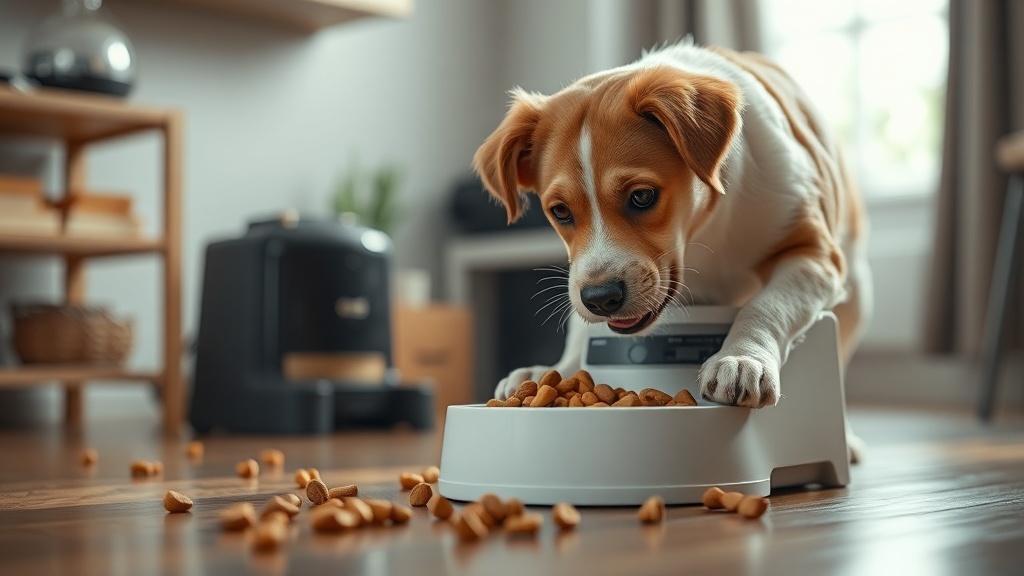
Automated pet feeders have become a cornerstone of the modern smart home, offering scheduled meals, portion control, and remote monitoring through dedicated mobile applications. However, even the most sophisticated devices are vulnerable to a deceptively simple failure: a kibble jam. When a single piece of food becomes lodged in the dispensing mechanism, the consequences can escalate far beyond a missed meal. The device can enter a complete software lockout — a state that technicians commonly refer to as “bricking.” This guide, written from the perspective of a CEDIA Certified Professional Designer, walks you through the root causes, professional repair steps, and long-term prevention strategies for fixing kibble jam “bricking” errors on automated smart pet feeders.
What Causes a Smart Pet Feeder to “Brick” After a Kibble Jam?
A kibble jam triggers a protective firmware lockout when the feeder’s motor stalls against an obstruction. The onboard controller interprets the resulting current spike as a hardware fault and halts all operations to prevent permanent motor burnout — a state commonly called “bricking.”
To understand why a mechanical obstruction leads to a full device lockout, it helps to understand how these feeders are engineered. Most automated feeders rely on a rotating dispensing impeller — a paddle-style rotor that sweeps kibble from the storage hopper through a chute and into the feeding bowl. The motor driving this impeller is typically a low-torque DC unit, designed for efficiency rather than raw power.
When a piece of kibble becomes wedged between the impeller and its housing, the motor’s rotational force is suddenly opposed. The motor continues to draw electrical current while producing no mechanical output — a condition known as a motor stall. The onboard microcontroller detects this abnormal current draw and immediately cuts power to the motor, logging an error state in its internal memory.
“Kibble jams are the leading cause of mechanical failure in automated pet feeders, often resulting in a software lockout or ‘bricked’ state.”
— Verified Internal Knowledge, Smart Home Integration Data
This protective behavior is intentional. Without it, a sustained stall would overheat the motor windings and permanently destroy the drive assembly. The firmware is essentially sacrificing temporary functionality to preserve the long-term integrity of the hardware. Understanding this logic is the first critical step toward resolving the issue correctly, rather than forcing a restart that could cause further damage.
The Primary Triggers: Why Jams Happen in the First Place
The leading cause of dispensing mechanism obstructions is incompatible kibble size or irregular shape. Oily food residue compounds the problem by coating the impeller and infrared sensors, creating false error readings that can mimic a real jam.
Incompatible kibble is the single most frequently overlooked cause of recurring jams. Large-breed formulas, for instance, often feature kibble pieces that exceed the mechanical clearance tolerances of feeders designed for small or medium breeds. Irregularly shaped pieces — stars, triangles, or multi-lobed designs used by some premium pet food brands — are particularly prone to bridging across the impeller housing. Always cross-reference the manufacturer’s recommended kibble diameter before purchasing food for use with a smart feeder.
Beyond kibble geometry, oily residue accumulation is a significant secondary trigger. High-fat or gravy-coated kibble leaves a lipid film on every surface it contacts. Over time, this film builds up on the impeller paddles, the chute walls, and critically, on the infrared sensors responsible for detecting blockages and food levels. A contaminated sensor may register a false “jam detected” signal even when the mechanism is physically clear, causing the firmware to enter its lockout state without a real mechanical cause.
Modern smart feeders utilize infrared sensors to detect blockages, but these same sensors can be triggered by accumulated dust or airborne debris rather than actual food particles. This creates a diagnostic challenge: the device appears bricked, but the root cause is purely an optical false-positive rather than a mechanical one.
Step-by-Step Guide to Fixing Kibble Jam “Bricking” Errors
Resolving a bricked smart feeder requires both physical obstruction removal and a deliberate firmware reset sequence. Simply unplugging the device is rarely sufficient — the error state persists in the logic board’s volatile memory until a proper reset protocol is executed.
Follow this professional, systematic process to safely restore your feeder to full operational status:
Phase 1: Safe Disassembly and Physical Inspection
- Cut power entirely. Disconnect the AC adapter from the wall outlet and, critically, remove any backup battery pack. Smart feeders with battery backup will continue to run their logic board even when unplugged from the wall.
- Empty the hopper completely. Remove all remaining kibble and store it separately. A full hopper adds gravitational pressure on the impeller, which can worsen an existing jam or prevent you from rotating the mechanism manually.
- Disassemble the chute and impeller tray. Most modern feeders feature tool-free disassembly for this exact reason. Consult your model’s manual to identify the correct disassembly sequence.
- Remove the obstruction manually. Use a soft-bristle brush or a folded piece of cardstock to dislodge the jammed kibble. Avoid metal tools, which can scratch sensor windows or damage the impeller paddles.
Phase 2: Sensor and Component Cleaning

- Clean the infrared sensors. Using a dry, lint-free microfiber cloth, gently wipe the lens of every infrared emitter and receiver inside the dispensing chamber. Even a thin film of kibble dust is sufficient to cause false error readings.
- Degrease the impeller assembly. Wash removable plastic components with warm water and a small amount of dish soap to dissolve oily food residue. Allow parts to air-dry completely before reassembly — moisture near the logic board is a serious risk.
- Inspect the chute for micro-fractures. Hairline cracks in the chute plastic can catch kibble edges and act as recurring jam points. If detected, the chute component should be replaced.
Phase 3: Firmware Reset and Logic Board Recovery
- Execute a hard power cycle. With the device fully reassembled and cleaned, leave it completely unpowered — no AC adapter, no batteries — for a minimum of 60 seconds. This allows the capacitors on the logic board to fully discharge, wiping the volatile error state from active memory.
- Perform the manufacturer’s reset sequence. Most smart feeders require a specific button combination — often a long press of the feed button combined with the power button — to formally clear the error log. Refer to your model’s documentation for the exact sequence, as this step varies significantly between brands.
- Check for and install firmware updates. Before returning the feeder to service, open the manufacturer’s companion app and check for available firmware updates. Modern firmware revisions often refine the feeder’s anti-jam logic, programming the motor to pulse or reverse briefly when resistance is detected, preventing future stalls before they escalate to a full lockout.
For a broader look at how these maintenance principles fit into a whole-home IoT strategy, our smart home strategy resources cover proactive device management across every connected system in your home.
Proactive Prevention: A CEDIA-Certified Maintenance Framework
According to CEDIA-certified integration standards, mechanical IoT devices require monthly physical inspections to maintain 99.9% uptime. A structured preventive maintenance schedule dramatically reduces the likelihood of recurring kibble jams and unexpected firmware lockouts.
Reactive troubleshooting is always more costly — in time and in pet welfare risk — than proactive prevention. As a CEDIA Certified Professional Designer, I advocate for treating your automated pet feeder with the same structured maintenance discipline applied to any other critical smart home component.
According to CEDIA’s professional integration standards, mechanical IoT devices should undergo monthly physical inspections to sustain near-perfect operational uptime. For a pet feeder, this monthly inspection should include the following checklist:
| Maintenance Task | Frequency | Purpose | Risk if Skipped |
|---|---|---|---|
| Infrared sensor cleaning | Monthly | Prevent false jam alerts from dust/debris | Phantom bricking events |
| Hopper and impeller degreasing | Monthly | Remove oily residue causing friction | Increased motor stall risk |
| Kibble size verification | Per food bag change | Ensure food matches feeder tolerances | Mechanical obstructions |
| Firmware update check | Monthly | Apply latest anti-jam motor logic | Outdated stall detection algorithms |
| Full hard power cycle | Quarterly | Clear accumulated error logs proactively | Silent logic board degradation |
| Chute and housing inspection | Monthly | Identify cracks or wear before they cause jams | Recurring jam hotspots |
Kibble selection also warrants ongoing attention. As you transition between pet food brands or life-stage formulas, verify that the new kibble’s dimensions remain within your feeder’s stated tolerances. This single habit eliminates the most common root cause of dispensing failures at zero cost.
When to Escalate: Signs Your Feeder Needs Professional Attention
If a smart feeder continues to brick after multiple reset attempts and thorough cleaning, the motor drive circuit or impeller assembly may have sustained permanent damage. At this point, a hardware-level repair or manufacturer warranty claim is warranted.
Most kibble jam bricking events are fully recoverable through the steps outlined above. However, there are scenarios that indicate deeper hardware damage requiring escalation. If the feeder’s companion app consistently reports a motor error immediately after a successful reset — within the first dispense cycle — the motor’s internal windings may have been partially burned during a prolonged stall event. Similarly, if the impeller turns with noticeable grinding resistance even after thorough cleaning, the drive gear assembly may have sustained mechanical wear that cleaning alone cannot resolve.
In these cases, contact the manufacturer to initiate a warranty claim. Document the error codes displayed in the companion app, as these logs are typically exportable and will expedite the warranty assessment process. As a final note, always have a manual backup feeding plan in place whenever a smart feeder is taken offline for maintenance — your pet’s schedule should never be contingent on a single point of technological failure.
Frequently Asked Questions
Why does my smart pet feeder stay unresponsive even after I remove the kibble jam?
Removing the physical obstruction is only the first step. The device remains unresponsive because the error state is stored in the feeder’s volatile memory — specifically on the logic board. The firmware enters a protective lockout when it detects a motor stall, and that lockout persists until cleared through a deliberate reset sequence. This requires removing both the power cable and backup batteries for at least 60 seconds and then performing the manufacturer’s specific button-press reset procedure. Simply unplugging and replugging the feeder is rarely sufficient to clear the stored error flag.
Can the type of kibble I use really cause a smart feeder to brick?
Yes, absolutely. Incompatible kibble size and shape is the primary mechanical trigger for dispensing obstructions. Large, irregularly shaped kibble pieces — such as those formulated for large breeds — may exceed the clearance tolerances of the feeder’s impeller housing. Additionally, oily or gravy-coated kibble deposits lipid residue on the impeller and infrared sensors over time, increasing friction and causing false blockage alerts. Always verify that your chosen kibble’s dimensions conform to the maximum size specifications listed in your feeder’s documentation before each food bag change.
How often should I perform maintenance on my automated pet feeder to prevent future jams?
CEDIA-certified integration standards for mechanical IoT devices recommend monthly physical inspections to maintain 99.9% operational uptime. For a smart pet feeder, this means monthly cleaning of infrared sensors with a dry microfiber cloth, monthly degreasing of the hopper and impeller assembly, and a monthly check for firmware updates in the manufacturer’s app. Firmware updates are particularly important because they often contain refined anti-jam logic that programs the motor to pulse or reverse when resistance is detected — a feature that can prevent minor obstructions from ever escalating into a full bricking event.